You might ask: "What is a pom-pom flower Bouquet?" It is eastly what it means: a bouquet made out of pom-poms. They are so cute, and you can add artificial flowers to the mix as well. You can use as many pom-poms as you like, to make your bouquet big(ger)

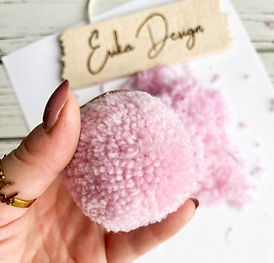
When I have leftover yarn, I like to make pom-poms. It's just so relaxing, and exciting at the same time. It's so nice to see how the yarn look when it becomes a pom-pom. The white one above is really fluffy, it's like touching a cloud. The pink ones are also fluffy, but have a different feel to the touch, and they definitely look different than the white one.
How can we make a pom-pom flower bouquet?
First, we need to decide on the colours :-). Oh yes, that's important! Sometimes we just work with what we have, but if we want the best result, we need to plan. I usually go online, and look for a nice picture, photo and get inspiration from that. Or, I think because we're making a bouquet, it's better to check real flower bouquets for references. I also search for trendy colours. I had this pink colour yarn for ages, and pink is so trendy now. On top of everything, my sofa is grey, and these 2 colours are just perfect together.

So, when we have the colour scheme, we need the tools and materials for the bouquet.
We'll need:
- Yarn for the pom-pom(s)
- stick for the stem(s) (you could probably use artificial ones, but I never tried that before)
- glue to secure the pom-pom to the stick
- pom-pom maker tool
How to make a Pom-pom with Erika Design's pom-pom tool?
It's really easy. As you can see, my tool has a smaller part and a bigger part. That's because with the bigger part (top part) you can make bigger pom-poms, and with the smaller one (bottom), you can make smaller pom-poms.
I used the small part for my pom-poms.
These are the steps you need to follow to make a pom-pom:

- wrap your yarn around the tool. the more you wrap it, the fluffier the pom will be.
- tie the center. You need to be really careful with this step. if you don't tie it strong, the pom-pom might get lose, and it will shed. My recommendation is never use silk or material that can break easily.
- Separate (cut) the yarn from the tool
- "style" your pom.
My suggestions for the pom-poms making:
- the more you wrap around the tool, the bigger the pom-pom gets,
- Tie the center at least 3 times. I tied it 5times (double knot)
- don't be afraid of the "styling". Trim as much as you need to.
Now finish the bouquet
When you have at least 3 pom-poms, you can have a bouquet. (I learned it from a flower shop, that it's nicer if you have odd number of flowers in a bouquet).
So, you have 3 pom-poms, you need 3 sticks. You can use short or long sticks. I had a small vase I wanted to put the bouquet in, so I needed short sticks.
Glue the top of the sticks with basically any type of glue and push the sticks into the pom. If you have a really nice, fat pom-pom, you might need to push it harder. If you haven't tied the center good enough, you might lose some string from the pom-pom during this step. Let the glue dry for a couple of minutes, and you're done!

Some of us, including me, can learn more easily if there's a visual tutorial, so here's the youtube video of how I make this bouquet.
I hope you like your pom-pom flower bouquet. If you made one using this tutorial, pls tag me on social medial: https://linktr.ee/ErikaDesign
Thank you for reading,

Comments
Post a Comment